Make a good impression on your customers by sending them well-designed sales forms. QuickBooks Online helps you create them.
Your company’s “brand” can be composed of many things (and has many definitions), but it’s really about what pops into your customers’ minds when they think of you. Key components include your logo, your color scheme, and any other identifying visual element that people associate with your business.
A good way to reinforce this image is by making sure that a unifying graphic theme runs through every piece of print or web-based customer content you create, like your website, brochures, blog, and ebooks. Your brand should also be visible on all sales forms you dispatch, like invoices and receipts.
QuickBooks Online comes with its own default sales form style; this is the layout and content that will automatically display when you start a new transaction. You can easily change this and have it apply to all transactions.
Your logo is an important element of your company’s brand. QuickBooks Online lets you include it on sales forms.
Here’s how it works. Click on the gear icon in the upper right of the screen, next to your company name. Select Custom Form Styles to open the table of existing styles. There should be one labeled Standard, though there may be another labeled Classic. You can make either the default by clicking Make Default or Remove as default using the down arrows and links under ACTION at the far right of each row.
Click the Edit link for the default style. This screen contains many of QuickBooks Online’s customization tools. The Style tab in the left vertical toolbar is automatically highlighted. In the column to its right, click through the five design options available and leave the desired one selected. Then click the plus (+) sign in the upper right of the screen. Browse for your logo file when the directory opens and double-click on it to add it to the top of your sales forms. Choose the color scheme you want by clicking in the correct box displayed below.
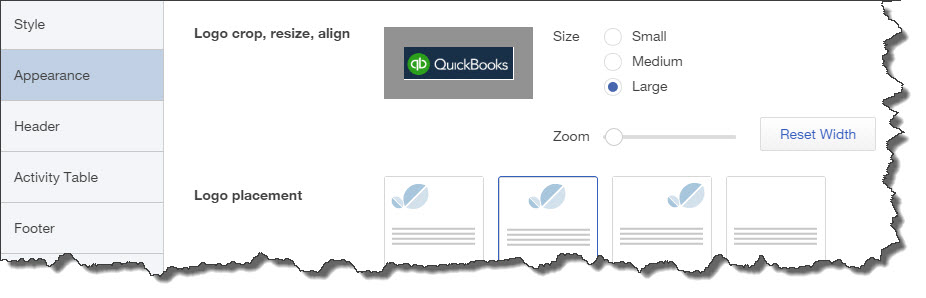
When you’re done there, click on the Appearance tab to specify your logo’s placement and change any other settings.
Content Critical

You can decide which fields should and shouldn’t appear on your sales forms by checking and unchecking boxes.
You won’t necessarily need to make every data field available on your sales forms. But you want to include every field you might possibly need without displaying extraneous content areas. QuickBooks Online lets you turn fields on and off and change their labels easily by checking and unchecking boxes.
Click the Header tab on the left to start this process. Among your options here are:
- Form names. Do you want invoices to say “Invoice,” for example? Do you want to use form numbers and allow custom transaction numbers?
- Company. How much of your company’s contact information should appear?
- Customer. Do you want fields for Terms, Due date, etc?
- Custom. Do you need to define custom fields?
You’ll see more options when you click on the Activity Table tab in the left vertical pane (see image above). Not only can you choose what content appears and how its labels read, but you can also indicate what percentage of that line each entry should occupy. Under WIDTH%, click on the plus (+) and minus (-) buttons to the right of each number to size it (your numbers, of course, should total 100).
Warning: Many of the decisions you have to make when customizing sales forms are simple. Others take some consideration, like custom fields and the handling of billable time. We can help you with these.
Click on the final tab in the left navigation pane, Footer, to add or edit text that should be displayed at the bottom of your sales forms. Click Save in the lower right when you’re done.

Some settings may need to be tweaked in Account and Settings.
Note: As you’re browsing through the content options available as described above, you may find that a field appears to be missing or needs a default setting changed. If this occurs, click on the gear icon in the upper right of the main screen, then on Your Company | Account and Settings. Click on the Sales tab in the left vertical pane to get to Sales form content.
Consistent, well-designed sales forms will help promote your brand and present a polished, professional image to your customers.